Sunday, December 27, 2009

Turkey Broth

Even if you never usually make stock from bones, now is a good time to start since you have all those left over turkey bones!


Home made broth lifts soups and sauces into a different league, and it really isn't difficult to make

Put all the turkey bones and skin into a large pot and cover with cold water. Add "pot herbs", an onion, a carrot, a celery stick, a couple of bay leaves, a few peppercorns and a handful of parsley stalks.

Bring the pot to a simmer then transfer to an electric slow cooker (crock pot).

If you don’t have a crock pot, you can cover and put in a very low oven (200F/100C) for six hours or overnight.

Once the time is up, strain the stock and cool it, before chilling in the fridge and lifting off the fat.

Thursday, December 24, 2009

My Christmas contribution

This year we are celebrating Christmas at my daughter's new home - her first Christmas there! My contribution is going to be Tiriamisu.  Its really easy to make but this time, for some reason, we just could not find the savoiardi - ended up ordering them from Amazon! Whats so great about this recipe is that there is no cooking at all so it's quick to make. It's important that, since the eggs are raw, you use really fresh eggs - better taste and safer!


Ingredients
500 gms Mascarpone
150 gms savoiardi (lady fingers)
4 eggs
4 tsp sugar
1/2 cup strong coffee mixed with 1/2 cup coffee liquor
Powdered chocolate (dark/bitter)
1 pinch salt

Method
Beat the egg yolks and sugar until soft and fluffy.
Add the mascarpone and whip to a cream.
Beat the egg whites with a pinch of salt until fluffy then gently fold into the mascarpone mixture
Dip the sponge fingers into the coffee and, in a large dish, alternate between layers of the sponge fingers and a layer of mascarpone cream.
When done, dust with a layer of bitter chocolate powder.
Cover, put in the fridge, and serve when cold.

I find that if you add the cocoa powder before serving it looks better!

Monday, December 21, 2009

Linzer Cookies

I adapted this from an old recipe and updated it with a modern touch with a recipe i found on Delish
They make great last minuite gifts and are rather festive!


Ingredients
8 oz roasted hazelnuts *
1/2 cup cornflour (cornstarch)
1 1/2 cup unsalted butter,softened
1 1/3 cup icing (confectioners') sugar
2 tsp vanilla extract
3/4 tsp salt
1 egg
2 3/4 cup flour
1/2 tsp ground cinnamon
1/4 tsp ground allspice
1 tsp grated lemon rind
3/4 cup raspberry jam

Method
In a food processor with knife blade attached, pulse hazelnuts and cornflour until pecans are finely ground.

In  a large bowl, beat butter and 1 cup icing sugar at medium speed until mixed. Increase speed to high; beat 2 minutes or until light and fluffy, occasionally scraping bowl. Lower to medium speed and beat in vanilla, salt, and egg. Reduce speed to low and gradually beat in flour, spices, lemon rind and nut mixture just until blended, occasionally scraping bowl.

Divide dough into 2 equal pieces. Wrap each disk with plastic wrap and refrigerate 4 to 5 hours or until dough is firm enough to roll.

Preheat oven to 325 degrees F. Remove a piece of dough from refrigerator and if necessary, let stand 10 to 15 minutes at room temperature for easier rolling. On lightly floured surface, using a floured rolling pin, roll dough 1/8 inch thick. With a floured 21/4-inch round cookie cutter, cut dough into as many cookies as possible.

Cut the same number of pieces from the 2nd piece of dough and put aside and with floured 1- to 11/4-inch round cookie cutter, cut out the centers. With lightly floured spatula, carefully place cookies, 1 inch apart, on ungreased large cookie sheet. Any left over dough can be used to make more 'tops' and 'bottoms'.

Bake cookies 17 to 20 minutes or until edges are lightly browned. Transfer cookies to wire rack to cool.

In small bowl, stir jam with fork until smooth. Spread scant measuring teaspoon jam on top of whole cookies; place cutout cookies on top. Store cookies, with waxed paper between layers, in tightly covered container at room temperature up to 1 week or in freezer up to 2 months.

When ready to serve sprinkle with icing sugar.

*You can use pecans or almonds instead of hazelnuts

Potato Fritters

A recipe that I found on Butta la pasta, a great Italian site that has the most wonderful recipes!
Potato fritters are a quick and easy meal and accompanied by a salad makes for a great main course or a quick supper. Check out the site for more recipes - in Italian!


Ingredients
400 gr cooked potatoes, mashed or cubed
130 gr flour
50 gr grated parmiggiano
1 tsp powdered mustard
50 gr butter (cut in small pieces)
1 egg
1 clove of garlic(crushed)
1 tsp cumin seeds
1/2 cup milk
salt and pepper to taste

Method
Mix the flour, cheese, mustard, salt and pepper
Add the butter and mix till you get a breadcrumb like consistency.
Add the beaten egg, the garlic, cumin and milk
Mix well then add the potatoes.
Cover a baking tray with greasproof paper, spay with non stick then put spoonfulls of the mixture about 1cm away from each othere.
Cook in a pre heated oven at 200C for about 15 mins

Sunday, December 13, 2009

Chocolate Truffles

This is a really easy recipe that makes a great gift. The success of these truffles depends solely on the ingredients used.
First decide on the type of chocolate - milk or dark? sweet, semi sweet or white. Whatever your preference try and get the best quality possible.
Next is your choice of the alcohol you will be using. If you want a coffee flavour, tia Maria or Kahlua mixed with some strong coffee powder should do the trick. Grand Marnier and some orange zest should make great orange flavoured truffles....and so on....use your imagination!
A quick note, you don't have to use alcohol - you can also use jam or fruit puree instead.
The truffles will then be rolled in powdered chocolate/cocoa powder - again, choose a good quality chocolate.You can also re roll in chocolate sprinkles.


Ingredients
8 ounces (227 grams) chocolate, cut into small pieces. My preference is for semi-sweet
3/4 cup (180 ml) heavy whipping cream
2 tablespoons (28 grams) unsalted butter
2 tablespoons alcohol (or jam)
Orange zest, coffee or whatever you have decided to use.
Powdered chocolate/chocolate sprinkles

Method
Place the chopped chocolate in a medium sized stainless steel bowl. You could also sue a food processor but don't grind too finely.
Heat the cream and butter in a small saucepan over medium heat and bring to a boil.
Immediately pour the boiling cream over the chocolate and allow to stand for 5 minutes.
Stir with a whisk until smooth.
If desired, add the alcohol or flavoring
Cover and place in the fridge until the truffle mixture is firm .This can take a couple of hours so I find its sometimes better to leave overnight and continue the next day.

Shape the Truffles.

Decide on your coating - chocolate powder, can also just be icing sugar, again, imagination comes in handy! Put the coating in a large flat plate.
Remove the truffle mixture from the fridge
Here is the fun part... form the chocolate into round bite-sized balls, using your fingers - the faster and less contact with warm hands the better!
Roll the truffle in the coating and place on a parchment lined baking sheet or tray.
Cover and place in the fridge until firm.
Truffles can be refrigerated for a couple of weeks or else frozen for a couple of months.
Bring to room temperature before serving.

You can also place them in paper cups for presentation. They look so professional and are so yummy that they make a great gift.

Friday, December 11, 2009

Eggnog

Eggnog - warms you up on a cold day - not that we have many in Arizona but it has gone down to 45f  and Up north in Flagstaff they had 18" of snow!!! So you see, Arizona is not all sun and cactus!

I got some interesting information by Nanna Rognvaldardottir on an article taken from Whatscookingamerica.net. She explains that Eggnog literally means eggs inside a small cup. It is used as a toast to ones health.  Eggnog, however, is first mentioned in the early nineteenth century but seems to have been popular on both sides of the Atlantic at that time.
If anyone knows more about the origin of this drink please let me know!
The recipe for eggnog (eggs beaten with sugar, milk or cream, and some kind of spirit) has traveled well, adapting to local tastes wherever it has landed.
Eggnog goes by the name coquito in Puerto Rico, where, not surprisingly, rum is the liquor of choice (as it is these days for many eggnog lovers in the U.S.). There the drink has the added appeal of being made with fresh coconut juice or coconut milk.
Mexican eggnog, known as rompope, was created in the convent of Santa Clara in the state of Puebla. The basic recipe is augmented with a heavy dose of Mexican cinnamon and rum or grain alcohol, and the resulting drink is sipped as a liqueur.
In Peru, holidays are celebrated with a biblia con pisco, an eggnog made with the Peruvian pomace brandy called pisco.

The Germans make a eggnog or rather egg soup with beer (Biersuppe).


Ingredients
2 small eggs - as fresh as possible
60g sugar
Pinch of freshly grated nutmeg
2 drops vanilla
200ml double cream
150ml milk
100ml dark rum

Method
In a medium bowl, beat the eggs until very frothy Don’t skimp here!
Add the sugar while beating vigorously, then sprinkle in the nutmeg and vanilla, beating all the time.
Pour in the cream, slowly, followed by the milk. Beat some more and then add the rum.

Tuesday, December 8, 2009

Mac and Cheese - with a twist!

Cooking pasta in parchment paper makes for an unusual dish. I am taking boring mac and cheese and trying to make it more interesting. The parchment paper allows the flavors to be absorbed one into another while keeping ingredients moist. I have suggested substitutions for the cheeses used.
Ingredients
4 cups milk
1 pound good-quality maccaroni
3 tablespoons unsalted butter
1/4 cup corn flour (corn starch)
3/4 cup emmental (or Gruyere or Provolone) cheese cut in cubes
3/4 cup Gorgonzola cheese, crumbled (or stilton or the cheaper danish blue)
1 1/2cup Parmesan cheese, shaved (or romano if you find parmesan too expensive
1/3 lb goat's milk cheese ( feta or Cotija or any other goat's cheese you prefer )
1/4 tsp salt
1/8 tsp freshly ground black pepper
Six 24 by 13-inch sheets parchment paper


Method
1. Bring the milk to a quick boil and take off the heat
2. Bring a pot of salted water to a boil. Add the maccaroni and cook for 6 minutes. Drain and keep in colander.
3. Make a bechamel sauce: Melt the butter. Take off the heat and the flour, stirring continuously until no lumps remain. Add 3 tbs of the warmed milk. Put back on the heat. Add the rest of the milk stirring continuously ( I use a whisk here). Lower the heat to medium. Continue to stir until the sauce is thick (about 5 minutes).
4. Add the cheeses to the bechamel. Use a whisk to thoroughly combine. DO not leave the sauce on its own as it will stick to the bottom so keep whisking!Add the salt and pepper.
5. Put the maccaroni to the pasta pot or in a large mixing bowl. Add the cheese sauce to the pasta. Stir to combine. Let cool.
6. Preheat the oven to 350 degrees F. Divide the maccaroni into 6 equal portions and place in the center of the parchment. Pick up each corner of the paper squares and twist on the top to make a package with a twist on top (!!). Place the bundles on a baking sheet with sides. Bake until the parchment turns pale brown and you can almost see the pasta turn brownish gold through the paper, about 45 minutes.
7. Serve immediately.

Coriander Chutney

A request from my cousin Paula to find a recipe where she could use her home grown coriander. (Cilantro in the US).

Ingredients
About 7oz of chopped coriander leaves
1/4 cup grated coconut (you can also use coconut cream if you want a creamier sauce)
2 green chillies
1/2 tsp ginger (freshly grated is great)
2 cloves of garlic crushed and mashed
1 small onion - chopped very small
juice of 1/2 lemon
1 tsp sugar
pinch of salt
Some recipes also add 1/2 cup yoghurt.


Put all the ingredients in a blender
READY!!

Sunday, December 6, 2009

Chestnut and Chocolate cake

This is a wonderfully soft, gooey chocolate cake, which can be served warm or cold - and it’s also ever so easy to make.


The Times on Line (UK) has the most wonderful recipes which I try then just have to share! You can see the original recipe here:

Ingredients
250g dark chocolate
250g unsalted butter
250g peeled cooked chestnuts (canned if you like, makes things easier!)
250ml milk
4 eggs, separated
125g sugar

Method
1 Melt the chocolate and butter in a pan over a gentle heat. In another pan, heat the chestnuts with the milk until just boiling, then mash thoroughly with a potato masher (or process to a rough puree in a food processor).
2 Put the egg yolks in a bowl and mix with the caster sugar. Stir in the chocolate mixture and the chestnut puree until you have a smooth, blended batter. Whisk the egg whites until stiff and fold them carefully into the batter.
3 Transfer the mixture to a greased, lined 23cm spring-form cake tin and bake at 170C for 25-30 minutes, until it is just set but still has a slight wobble.
4 you can  serve the cake warm, but leave to cool a little, then release the tin and slice carefully as it will be very soft and moussey. Or, leave it to go cold, by which time it will have set firm. You can serve it with a trickle of double cream, especially when warm, but it is also delicious as is.

Friday, December 4, 2009

Chocolate Raspberry Tartlets

Decadent, rich and not so good for the waistline...but what the heck....they taste great! Makes 24.


For the pastry
1 1/4 cup flour
1/3 cup unsweetened cocoa powder
1/3 cup sugar
1/2 cup unsalted butter
1 egg yolk
some cold water

Method
Use a food processor and pulse the 1st 3 ingredients
In a seperate bowl, whisk the yolk and 2tbs cold water
Add to the processor and mix till a ball forms. If necessary, add some more water.
Divide into 24 pieces
Heat oven to 375F
Shape the pieces of dough into balls and press into 1 3/4" muffin cups (use non stick muffin trays and do not grease) so the bottom and sides of the cups are covered.
Put aside.


For the filling:
Ingredients:
1 cup semi sweet chocolate (chopped)
2 tbs unsalted butter
1 egg (beaten)
1/3 cup sugar
1 tbs strong raspberry liqueur
2 tsp vanilla sugar.

Method.
In a small saucepan, mealt the chocolate and butter on a medium low heat, stir until smooth
Remove from heat and add the egg, liqueur sugar and vanilla, mixing well.
Spoon about a tablespoon into the pastry shells.
Bake for about 15 mins untill the filling is puffed up.
Leave in pan for about 15 mins then gently remove and place on a wire rack to cool completely.


Butter Cream
Ingredients:
1/4 cup softened unsalted butter
1/2 cup powdered sugar(sifted)
3 tbs unsweetened cocoa powder(sifted)
2 tbs raspberry jam. (dont use seedless jam - the real stuff is better)

Method
Beat well until a tickish consistency. If necessary, add more powdered sugar.
Spread on top of the cooled tarts.

Yum!

Apricot Bacon

Who does not love bacon!!! This is an easy yet different way of eating your favourite.


Ingredients
8 slices of thick cut bacon (fresh and easy have the best - i think it is called English Bacon)
2 tbs apricot jan
1 tsp fresh orange juice.


Method
Heat oven to 450
Line a baking sheet with foil and arrange bacon on so no slice overlaps.
Bake for about 12 mins
In the meantime, mix the jam and juice.
Drain the grease from the bacon tray and spread the jam mixture over the bacon
Bake for a few more minutes until nice and crisp.

ENJOY!

Wednesday, December 2, 2009

Quick and Easy Biscuits (Cookies)

I like having home-made  biscuits (cookies) at home and an easy way to ensure a constant supply is to make extra dough and freeze, then slice off what you need. The dough keeps well in the freezer for about a month - or around a week in the fridge.


Ingredients
4oz butter
4oz  sugar
Grated zest of one lemon or orange
(other options may include adding spices like cinnamon, ginger or nutmeg. This is a basic recipe so you can tweak it a bit! If you want chocolate flovoured biscuits, add  1 tbsp cocoa powder to the flour)
9oz  flour
1 egg
pinch of salt

Method
Beat the butter, sugar and zest together until light and fluffy.
Beat in the egg and salt.
Add the flour and using your hands work in  gently.
Shape the dough into a roll about 2" thick and wrap well in plastic wrap.
Put in the fridge for about an hour or if you are freezing, just put in the freezer

To bake, heat the oven to 350F.
Line a baking sheet with non-stick paper.
Cut the dough, straight from the fridge or freezer into ¼in slices and arrange, well spaced, on the baking sheet.

Bake for about 12 mins (the exact time will depend on the thickness of the biscuits) until very lightly coloured.
Put the biscuits onto a rack to cool .
These biscuits will be nice and crisp

Sunday, November 29, 2009

How to cook the Perfect Steak

Cooking the perfect steak can be a challenge. Smaller cuts of meat can dry out easily or cook too quickly so they become dry, tough or leathery. The best pan to cook them in is a heavy frying pan or griddle. I personally, prefer fillet but if you use the rump, the texture of the meat is firmer and the marbling gives it a full flavour. I got these great tips from the times on line and http://www.donaldrussell.co.uk/ .


Prepare the steaks
Make sure the meat is at  room temperature

Preheat your pan
Heat a griddle or frying pan over a high heat until hot, but not smoking. (If the pan is too hot, the outside will burn before the inside is done, too cold, and your steaks will be tough).

Brush the steaks with oil, or pour a little oil into the pan, and season if desired. I use canola but you can use olive too if you like the taste. The meat will sizzle when put on the pan - that tells you it is hot enough.

Cook on one side for 3-4 minutes, then reduce to a medium heat and cook for another 2-3 minutes.

Turn the steak over with a pair of tongs, and cook for a further 6 minutes. (You can vary the times here if you prefer a rare or well-done steak.)

Do not prick the meat with a fork or the juices will escape

To check if done, press the steak gently with the tip of your finger. Rare should be soft and supple, well done firm, and medium in between.

Remove from the pan, place on a rack and cover with foil and leave in a warm place for up to 10 minutes. Remember it is always better to over-rest your steaks than to under-rest them. Resting helps the meat to achieve the full flavour and tenderness.

Serve your steaks. The best knives to cut the meat are super sharp, un-serrated steak knives

 How do you like your meat??
Rare (bleu)

• Press-test: Soft
• The internal temperature is 45-47ºC
• The meat is bloody and the juices are dark red.

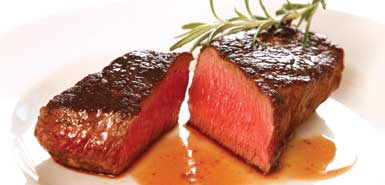
Medium rare (saignant)

• Press-test: Soft yet springy
• The internal temperature is 50-52ºC
• The meat is still bloody in the centre and the meat juice is light red.

Medium (a point)

• Press-test: Firm and springy
• The internal temperature is 55-60ºC
• The centre of the meat is pink.

Well done (bien cuit)

• Press-test: Firm
• The internal temperature is 64-70ºC
• The meat is cooked throughout and the juices are clear.

Best Cuts
Fillet

Fillet is the most tender, lean and mild flavoured of all the steaks, therefore the most luxurious and expensive.

Sirloin

Sirloin is tasty and tender with good marbling and a covering of fat on the outside. This fat is what makes sirloin taste so good, but you only need a little to get the full flavour benefits.

Ribeye

Ribeye is juicy and richly flavoured with a rugged appearance, generous marbling and firm texture. It has a wide ribbon of fat at the core which melts during cooking to make it taste extra succulent and mellow.

Rump

Rump is very lean with a robust, firm texture and strong beefy flavour. Traditional rump steaks are very sinewy, but good butchers cut round the sinews. This thicker cut, popular on the Continent, is called ‘Pavé’.

Tuesday, November 24, 2009

Perfect Piecrust

It's that time of year again - pies are abundant and often the problem is making the crust. Some people find this difficult and resort to store bought crusts but there is nothing like the taste of a home made pie crust!
Here are some tips for the perfect crust.

1.Use a mixture of shortening and butter. Shortening makes the pastry flaky and butter adds the great taste.
2. Make sure all the ingredients are chilled - I keep flour in the fridge.
3.Add the water very carefully - too much will make the crust tough and stodgy but if you use too little the crust will fall apart.
4. Don't over mix the dough
5.Salt, vinegar or lemon juice will help the crust from becoming too crumbly.
6. Don't stretch the dough when you roll it. It may look like it's reached the right size but will shrink when you bake it.

You can use a food processor on pulse to make pastry but I find that my hands work just as well (maybe because I have COLD hands!)


Quick Recipe
2/1/2 cups flour
1 tsp salt
(1 tbs sugar if this is for a sweet pasrty)
Sift together

Add 12tbs butter and 1/4 cup shortening cut into small pieces.
Using fingertips rub in  until the mixture looks like breadcrumbs.

Mix 1/2 cup iced water with 1 tbs white wine vinegar
Drizzle on mixture and work untill dough is formed.
Wrap in cling film and chill for 1 hour.

You can pre-bake using pie weights or dry beans at about 375 for about 10-12 mins. Remove weights and bake for another 10-12 mins

Tip: When you transfer the rolled out dough to the dish you are baking it in, line with foil before using the weights, then when you remove the weights cook the 2nd half with no foil to get the crust nice and golden,

Wednesday, November 18, 2009

Sausage and Rice Stuffed Peppers


Easy, tasty and healthy! Makes a great supper  - or a brunch!

You can use coloured peppers as well - they look pretty!


Ingredients (serves 3)
3 peppers, halved lengthwise and de seeded
2 Italian sausages.(remove from skins and crumble)
2 garlic cloves, minced
1 1/2 cup cooked brown rice
3 tbs fresh basil, chopped
3/4 cup tomato sauce (fresh is best but canned will do!)
1/2 cup shredded mozzarella
3 slices parma ham cut in half


Method
Heat oven to 425F
Place peppers, cut sides up in microwave, covered with wax paper, and zap for 2 mins or until crisp but tender.
In a pan, brown the sausages, add garlic, stir in rice and basil.
Spoon mixture into the pepper halves , add a slice of parma ham on top of each and put in  a baking dish lined in foil.
Spoon tomato sauce over and top with cheese
Bake 15-20 mins until peppers are tender and cheese slightly browned.
Enjoy!

Tuesday, November 17, 2009

Foodie Exchange with calgary, AB

Would you believe it..i got SMARTIES!!! haven't tasted them for years! and some cinnamon honey, beef sticks, more choc and a curry mix...and ketchup chips (crisps)
This exchange is such fun!
Thanks Suzie from Fairy taste
If you havent joined up yet, what are you waiting for? Its a great way to try different food suffs and make friends!

join up here

Saturday, November 14, 2009

NYC exchanges with AZ

What a great exchange this was! Andrea from High/Low Food/Drink send me lots of goodies with a note explaining them all!


1.Mamouns Hot sauce: from one of the BEST cheap eats in NYC - check her blog!
2.Fat witch Brownie: beloved brownies from Chelsea Market where Bobby Flay went to learn how to make brownies on a throwdown episode (I saw that show!!)
3.Jacques Torres Chocolate Bark: his wildly addictive sweet treat
4. Nathan's mustard - Cony Island's Hot Dog eating competition happens every year at Nathan's. Can be enjoyed on hot dogs on on giant pretzels as New Yorkers do!!

Andrea - what can i say!!! Your goodies were AMAZING!!!
Many Many Thanks!!!

Friday, November 13, 2009

Banana Pecan Bread

Great at tea time - even breakfast. Easy to make and keeps nice and moist.

Ingredients:
2 cups flour (sifted)
1tsp baking powder
1/4 tsp salt
1 egg
3/4 cup sugar
1/2 cup brown sugar
1/2 cup canola oil
1/2 tsp vanilla
3 ripe bananas, mashed
3/4 cup chopped pecans

Method
Pre heat oven to 325F. Grease a loaf pan.
Mix flour, baking powder and salt.
In another bowl, beat egg, sugar, vanilla and oil until combined.
Add flour mixture stirring with a wooden spoon.
Add mashed bananas, mix then fold in the pecans.
Bake for 40-60 minutes till it passes the toothpick test!
Cool then eat!

Thursday, November 12, 2009

Mulled Wine

Mulled wine, variations of which are popular around the world,  generally consists of wine mixed with spices and served hot. Originally, preparing mulled wine was a way to extend the life of a wine that had passed its prime,Nowadays, it is a traditional drink during winter, especially around Christmas.
There are several variotions:
Glögg is drunk in Scandinavian countries.
Glühwein is the German version of mulled wine, made with red wine, sugar and spices
Quentão is a Brazilian form of mulled wine. It is made of cachaça, an alcoholic beverage made from fermented sugarcane
Mulled wine is called vin brulé in Italy, vin chaud in France and grzane wino in Poland

In any language...bottoms up!!!
Mulled Wine Recipe
Makes about 16 servings.
Ingredients
1 orange
1 lemon (sliced)
10 whole cloves
5 cardamom pods

3 black peppercorns
Two  cinnamon sticks
1 1/2 liters  fruity red wine, such as Merlot
1 cup honey (you could always use sugar but honey gives this a great taste)
2/3 cup Grand Marnier on any orange-flavored liqueur

Method
Remove the zest from the orange.
Rinse and wring out a 12-inch-square piece of cheesecloth.
Wrap the orange zest, sliced lemon, cloves, pepper corns, cardamon pods, and cinnamon sticks in the cheesecloth and tie with a piece of kitchen string.
Cut the orange in half and squeeze the juice from the orange. Set the juice aside.
In a large  pot, combine the wine, honey, Grand Marnier, orange juice, and the cheesecloth package.
Heat, stirring occasionally to dissolve the honey, over low heat until hot but not boiling, about 30 minutes. (Never let it come to a boil. If you let it heat very slowly over low heat, the spices and orange zest can release their flavors.)
Serve warm.

Monday, November 9, 2009

Apple Chutney

A great recipe taken from the Times on line. I made a couple of jars of this and it's great with pork.
Makes three 500g jars
This chutney will last for up to six months and will improve as it matures.


Ingredients
1kg Bramley apples
500g onions, diced
400g tin chopped tomatoes
300ml cider vinegar
300ml orange juice
150g dried apples, chopped
2tsp ground allspice
1 tsp each ground ginger,
mace and mustard seeds
400g caster sugar

Method
1 Peel and core the apples and cut them into small chunks.
2 Place all the ingredients except the sugar in a preserving pan or other wide, deep pan. Bring just to the boil, then simmer for two hours, stirring frequently.
3 Add the sugar and stir well. Continue cooking over a low heat for an hour, stirring often.
4 Ladle into sterilised jars while still hot. When cold, store in the fridge or a cool, dark place.

Sunday, November 8, 2009

Perfect Pan di Spagna - Sponge Cake


The 'secret' to a perfect result is in the beating of the eggs and the sugar. It is during this stage that air is incorporated to the mixture and that is essential for the cake to turn out really soft and sponge like without using any yeast.Eggs and sugar have to be beaten for quite a while, never less than 15 mins, with a good beater until the mixture is frothy and a pale yellow in colour. To test that it has been beaten enough, if you let some of the mixture fall from the beater back into the mixture, it remains 'sitting' on top for a while. If this doesn’t happen it means that the eggs have not been beaten enough and you need to beat them much more.


Don't forget the salt - often omitted - as this helps the eggs to become light and fluffy

Another  phase where you have to be careful is the addition of the flour. This has to be sifted extremely well and added to the egg mixture using a wooden spoon with a gentle but fast movement, stirring from bottom to top, folding in as much air as possible

While cooking, the oven must NEVER be opened as this will cause the cake to deflate. Before removing it from the oven, check that the sides have pulled inwards from the pan, check that the cake is ready using a skewer poked into the middle of the cake. If it comes out absolutely clean then the cake is ready

It is also a good idea that when the cake is ready, turn off the oven but leave the cake there for about 10 mins so that it can cool down slowly. After that, turn the cake out of the pan and put it on a cooling rack

Ingredients:
6 eggs
180gms sugar
75 gms flour
75 gms corn flour (corn starch for Americans)
Pinch of salt
(optional - grated rind of 1/2 lemon)

Method
Put eggs and sugar into a bowl and beat for about 15 mins until you have a frothy foamy mixture Add the flours by sifting them into the mixture and folding gently with a wooden spoon.
Put the mixture into a well greased cake tin, level out the mixture and cook in a pre heated over at 150C for about 40 mins

This can be used as a base for tiramisu or trifle and is also delicious on its own with just a dusting of powdered sugar

Saturday, November 7, 2009

Acorn Squash Pasta

Easy, tasty and healthy! You can use pumpkin instead of squash, but do not used the canned stuff..yukkkk!!

Ingredients:
150gms squash or pumpkin
50gms parma ham
1 small red onion
50 gms scamorza (smoked provolone)
320g penne rigate ( you can also use farfalle)
salt and pepper to taste
Olive oil
Some chicken or vegetable broth.

Method:
Chop the onion finely and fry gently in the olive oil
Cook the squash or pumpkin, chop and add to the onion. Cook for about 5 mins.
Add the salt, pepper and finely sliced parma ham.
Cut the scamorza into cubes and add to the mixture.
Let cook, adding some broth if mixture starts to dry.

Cook the pasta al dente in salted water, drain and add to the squash mixture.

ENJOY!

Thursday, November 5, 2009

Foodie exchange - Australia with Arizona


Vegemite!! I love that!! and some super pink salt, crystalised ginger, mango marinade and cadburys!! This was one of the best exchanges - and it made it all the way from Australia!!

Thanks Connor!

Here's to more great exchanges!

Sign up people!

JUST CLICK HERE!

Tuesday, November 3, 2009

Foodie Exchange - Toronto with Arizona


Whats fun!! and i got CHOCOLATES!! yummm
Some very interesting vinegar, and lime rub..this was a great exchange!

I would encourage more people to sign up as this is proving to be a great way to taste different foods.

Can't wait for the next package to arrive from Australia!!!

Saturday, October 31, 2009

Swiss Fondue

Now that the weather is getting cooler, there is nothing more sociable than a pot of Swiss Fondue.( for the Swiss, fondue is ALWAYS made of cheese) There is a game assoicated with the dish : If someone loses their piece of bread of the fork they have to pay a penalty! What that will be is up to you!
The trick to a successful fondue  is to ensure that the cheese  sauce stays smooth. Cheese has a propensity to get stringy or to "seize up" into clumps, the fat separating from the proteins. Do not over heat as cheese tends to ball up at higher temperatures and if possible use a fondue pot. Don't let the cheese cool down too much before serving, as it tends to get stringier and tougher as it cools. Don't over stir the cheese, doing so will encourage stringiness.. so many don'ts!!
When we lived in the Ticino, we would use Grappa instead of kirsh.


Ingredients

1/2 pound (Real) Swiss cheese such as Jarlsberg or Emmenthaler, shredded  (or try Vacherin Fribourgeois)
1/2 pound Gruyere cheese, shredded ( aged about 8 months is best)
2 tablespoons cornstarch *
1 garlic clove, peeled, halved crosswise
1 cup dry white wine like a Sauvignon Blanc
1/4 cup kirsh
1 tablespoon lemon juice
Pinch nutmeg
*The cornstarch helps stabilize the sauce
Crusty bread, cubed, for dipping (can be a day old as it does not need to be super fresh - in fact a bit old is better!)When you cut the bread, try make sure that each piece had a bit of crust.

Method

1 Place the shredded cheese and cornstarch in a plastic bag. Seal, shake to coat the cheese with cornstarch. Set aside.

2 Rub the inside of a 4-quart pot with the garlic, then discard. Over medium heat, add the wine and lemon juice and bring to a gentle simmer. Gradually stir the cheese into the wine. Stir constantly in a zig-zag pattern to prevent the cheese from seizing and balling up. Cook until the cheese is just melted and creamy. Do not let boil. Once smooth, stir in the kirsh and  nutmeg.
3 Transfer the cheese to a fondue serving pot, set over a flame to keep warm.
4. Spear the bread cubes with a fondue fork, dip in mixture till coated in cheese, and EAT!!!

Serves 4.

NB: As the cheese gets less and less, scrape the sides with your bread.When almost all the cheese is gone, lower the flame under the fondue pot.The last bit of cheese will be all toasty and yummy!

Friday, October 30, 2009

Tomato and Basil Compote


Compote comes from the French verb compoter, which means to cook something gently until it breaks down and reduces into a babyfood-like purée. This recipe can be used as a sauce for meat, fish or even pasta dishes.It can also be used as a base for soups, curries and stews.

This is adapted from a recipe in the Telegraph (UK)

You will need a liquidiser, food processor or mouli légumes (food mill) to purée this sauce.
For each 2lb of tomatoes you will need 8 tbsp extra virgin olive oil.

Roughly chop the tomatoes, put in a colander to let any excess watery juice drain away then put in a pan with 4 cloves of garlic, 4 sprigs of basil and the oil.

Add 1tbs of sugar and 1tsp of sea salt. Bring to the boil, turn down the heat and simmer for about 30 minutes, until the compote is paler in colour (a sort of reddish orange).

Do not let the mixture burn or stick to the pan.

Allow to cool, then liquidise until smooth. Pour into jars, and store in the fridge – it will keep for at least 2 weeks – or freeze (not in a jar but in a suitable freezer container).

Thursday, October 29, 2009

Foodie Exchange

My foodie package from Baltimore arrived!!
Clam chowder, some rather interesting cookies, chips and crab cake mix!!

YUM!!!

If you havent already, dont forget to join the foodie exchange!

Its a great way to make new friends and try new foods!

Sunday, October 25, 2009

Wiener Schnitzel

This is by far my favourite veal recipe. Veal is very easy to find in Europe - no that much in the USA it seems. You could substitute pork fillet - that would be the closest to veal. This is a really great dish!!

Wiener Schnitzel is originally made with veal. The meat is coated in breadcrumbs and fried in a pan. Schnitzel is found on all the menus in Germany and is a popular dish to be made at home.
You can also use this recipe to make a pork Schnitzel or a chicken Schnitzel if preferred.

A Wiener Schnitzel is only original when made from veal. When made with pork (Schweineschnitzel) is known as "Schnitzel Wiener Art".
Wiener Schnitzel is served with lemon slices that  you squeeze over the meat. Anchovies and capers can also be served.

Ingredients
4 veal fillets (approx each 200g) or use veal rib eye if fillet is unavailable
salt and pepper
1 cup flour
3 eggs
150g breadbrumbs preferably made from stale French or Italian bread
Butter or lard (clarified butter* is actually the best here)

Method
Flatten the meat with a rolling pin or meat hammer. It is very important that the meat is almost paper thin.It's best to have the butcher pound the meat thinly for you, but if you want or need to do it yourself, position the 5-ounce piece of veal between 2 sheets of wax paper or parchment paper. Gently at first, then more forcefully, use a flat-bladed meat pounder to pound the veal into a fairly round shape 7 to 8 inches in diameter.
First coat the seasoned meat in flour, then dip into beaten egg. Lastly coat in breadcrumbs.
The schnitzels can be covered and left for 1 to 2 hours at a cool room temperature before cooking.
Heat oil in a pan and then fry the Schnitzel on both sides until brown and the meat is cooked through. Use enough butter or lard.During cooking, press the Schnitzel lightly with the back of a spoon. Cook for aprox. 2-4 mins on both sides.
Once cooked serve straight away.

*To clarify a pound of butter, heat it slowly over low heat in a medium saucepan. After it has melted, let it stand for 10 minutes, then use a spoon to skim off the foamy solids on the top. Pour off the clarified butter, leaving the watery residue in the pan (a fat-separator cup can be helpful for this). Pour the cooled butter into a plastic container, cover and refrigerate. The butter may be used a second time after frying a batch of schnitzel: Pass it through a fine-mesh strainer to eliminate any solids, then cover and refrigerate as above. Use within 1 month.

Saturday, October 24, 2009

Almond and Limoncello cake

Almonds and Limoncello - what could be better! I got this recipe off a friend of mine in Taormina, Sicily - the translation should be fine but i didn't convert the metric - there's the converter on my site that you can use!
I used Sicilian Limoncello  - homage to Lucia!!!
Ingredients:

350 gms finely ground almonds
200 gms sugar
200gms flour
Grated rind of a lemon
4 eggs
1/2 cup limoncello
2 tsp baking powder


Method
Beat the eggs with the sugar till you get a white foam
Add the lemon rind and a pinch of salt
Add the ground almonds, the sifted flour and the baking powder
Put into a greased pan and bake for 40 mins at 170C
When done sift powdered sugar on top.

Friday, October 23, 2009

Plums, plums and more plums


There are many  types of plums which can be found in a  variety of colours and sizes. The most common plums are: the Damson or Damask Plum (oval shaped with yellow-green flesh, and dark blue to indigo skin, Mirabelle (small, oval shaped, smooth-textured flesh, and flecked dark yellow colour), Greengage (firm, green to yellow skin and flesh even when ripe), Golden or yellowgage plum (similar to the greengage, but yellow in colour) and the Satsuma plum (firm red flesh with a red skin).
Its almost the end of plum season so here are a few ideas to use up the fruit. This great list was sent to me by Sophie in the UK - thanks Soph! I liked the sauce idea best - but they are all great ways to use plums

Poached with vanilla

Put 225ml of water in a pan with 200g sugar and a vanilla pod, and bring to the boil. Stir to dissolve the sugar. Add about 10 stoned and quartered plums and simmer for about five minutes until soft. Cool and serve with vanilla yoghurt.

A sauce for roast pork
Heat 1 tbs vegetable oil in a pan and sauté a chopped shallot with some chopped ginger. Add a sprinkling of cumin and ground coriander, 6 chopped plums, 2 tbsp of cider vinegar, 4 tbsp of sugar and a splash of soy sauce and simmer until thick.

Baked with Amaretto
Halve and stone 10 plums and lay cut side up in an ovenproof dish. Mix some crushed Amaretti biscuits with a little Amaretto liqueur. Spoon into the hollow of each plum and bake in the oven at 200C/gas 6 for about 15 minutes until tender.

A spicy relish for cheese
Chop 500g plums and 500g apples, and place in a pan with a chopped onion, a wedge of chopped ginger, a chopped chilli, 250ml cider vinegar, 225g sugar and 75g raisins. Simmer for about 40 minutes until thick, then pot in sterilised jars.

Quick Plum pie
Pile halved stoned plums into a pie dish and sprinkle with sugar. Cover with shortcrust pastry and press on to the rim of the dish. Make a hole in the centre. Brush with more milk, sprinkle with sugar and bake at 200C/gas 6 for about 40-45 minutes. 

Thursday, October 22, 2009

Pecan Pie

November is the Thanksgiving holiday here in the US, so I thought I'd check out some traditional recipes.
One that stuck out was for Pecan Pie. Never made that before. Most of the recipes asked for corn syrup which didn't sound very inviting so I thought I'd muddle up on my own and try come up with something.

I made a standard pie crust (not too keen on the store bought ones) using 1/2 butter and 1/2 vegetable shortening as that makes it lighter. I used the recipe for the mince pies pastry which you can find here.

Now for the filling - I received some great pecans from my foodie exchange with Oklahoma so that was taken care of. The trick is to toast them and this is an easy and fast way.
Use a large pan, non stick is good - DO NOT GREASE! Heat, toss the pecans till they are toasty and you're done!

Ingredients for filling
1 cup dark brown sugar
1/4 cup sugar
3 eggs
1 tbs flour
1 tbs milk
1 tsp vanilla essence

Method
Beat all the above like crazy then add 2 cups of crushed toasted pecans.
Pour into the prepared pie crust and cook at abour 350F for 30-40 mins or until done.

I blind baked the pastry crust for about 10 mins just to be sure it cooked from the underneath!

Wednesday, October 21, 2009

Biscuits, cookies???

I learnt British English - which, AMAZINGLY has a couple of differences to American English.
When I first came to Arizona, I was offered 'Biscuits and Gravy' for breakfast. My first thought was what the heck is that! Biscuits, to me, are the equivalent of Cookies for an American so you can understand my confusion.
Anyways, I finally figured out that biscuits are a type of scone (I think!) served with a gravy that is like a bechamel with bacon bits! Still not my cuppa tea but since they seem to be a traditional South West 'delicacy' I thought I'd add the recipe for BISCUITS. I'll omit the gravy - that was a bit too much for me to handle!


The secret to making a good, light southern style biscuit is in the flour which, I am told, has to be of the 'soft' kind. Haven't figured out what that really means but apparently there is a brand called White Lily. If you can't get that then substituting half the flour with cake flour would do. Again, I had to figure out what cake flour is and I got this info - cake flour is made from the endosperm of soft wheat. The endosperm is the softest part of the wheat kernel, making cake flour the finest flour available. As cake flour is milled, it is heavily bleached, not only to make it white but to break down the protein in the flour. Typically, cake flour is around seven percent protein, much lower than other flours; bread flour, for example, has twice that amount of protein.


OK, so far so good.
 
Ingredients
12 oz flour (see above)
4 tsp baking powder 
1/4 tsp baking soda
3/4 tsp salt
1oz unsalted butter, chilled
1 cup buttermilk, chilled
2oz vegetable shortening, chilled
 
Method
Heat the oven to 400F
Mix all the dry ingredients
Using fingertips, rub the butter and shortening into the dry ingredients until they look like bread crumbs
Make a well in the mixture and pour in the buttermilk
Stir till the dough starts forming a lump then knead well.
Turn onto a floured surface and knead the dough by pushing it away from you  with the heels of your hands. Fold in half, give a quarter turn and do that agan until smooth.
Flatten the dough till it is about 3/4 inch thick
Using a 3" cutter, cut as many rounds as the dough permits.
Press your thumb on the top to make a shallow impression
Bake about 15 mins or until golden brown on top - they should rise!!
Let cool for a few mins then eat!

Mince Pies

Mince pies have been eaten as part of a traditional British Christmas since as long ago as the 16th century. Then, they were made of meat along with spices and fruit and alcohol to preserve the meat.Now, mincepies are made with sweet mincemeat; a mixture of dried fruits, sugar, spices, suet  and brandy.
When mincemeat is made in the English kitchen, all the family takes turns in stirring and making a secret wish. The mixture is always stirred clockwise To stir in a counter-clockwise direction is to ask for trouble in the coming year!

You can buy mincemeat in speciality stores, but use my recipe - its more fun and the taste can't be beaten!
We now need the recipe for the pastry.

Ingredients
2/1/2 cups flour
pinch of salt
1/2 cup unsalted butter, chilled and cut into pieces
1/2 cup vegetable shortening, chilled and cut into pieces
6-7 tbs cold water (iced is better)

Method
Sift the flour and salt
Rub the butter and shortening in using fingertips till you get a breadcrumb like consistency
Add the water bit by bit until the mixture begins to combine.
Shape into a ball and refrigerate for about 30 mins.

Use a low cupcake type tray and line with circles of the pastry, fill with the mince meat, cover with another circle and prick the tops. You can also brush with beaten egg
Cook at about 400F until nice and brown
While still warm, sprinkle with powdered sugar.


Tuesday, October 20, 2009

Foodie Exchange Package

Its here! A box full of Oklahoma goodies!
I got Honey - yum!
BBQ Sauce - which  I can't wait to try
and Pecans!

It's a great idea - I am so anticipating the next package which will be from Montreal!
If you haven't yet joined, give it a shot - its a great way to try new foods from all over!

Google Groups
Foodie Exchange
Visit this group

Monday, October 19, 2009

How to REALLY drink Coffee - the Italian way!

The Italians have the art of drinking coffee honed to perfection - They have their rituals and expectations that are strictly adhered to so if you are in Italy, you should be aware of them!

For example, the use of  word espresso. This a technical term in Italian, not an everyday one. As espresso is the default setting and single the default dose, a single espresso is simply known as un caffè. If you want an 'espresso'  you can simply ask for a "caffe" and remember to drink in quickly. Espresso is not made to sip casually, it is made to be drunk in two or three sips at most.


Coffee is not  can be served by itself and is generally served after a meal, with the exception of breakfast. Any coffee after breakfast should not have milk in it (unless it is a macchiato)and cappuccino orders after 11 am are often laughed at.(corrections accepted, thanks Simona !)

Requesting a mint frappuccino in Italy is like asking for a single malt whisky and lemonade with a swizzle stick in a Glasgow pub. There are but one or two regional exceptions to this rule that have met with the blessing of the general coffee synod.
In Naples, you can order un caffè alla nocciola – a frothy espresso with hazelnut cream.
In Milan you can impress the locals by asking for un marocchino, a sort of upside-down cappuccino, served in a small glass which is first sprinkled with cocoa powder, then hit with a blob of frothed milk, then spiked with a shot of espresso.

Coffee is generally served in a way that allows you to down it in a couple of shots - there is no lingering and sipping slowly!

I got most of this information from Life in Italy and the Telegraph - check the site out to learn how to REALLY enjoy your coffee!

Popular coffees ordered in Italy:

Espresso : known a Caffe in Italy, served in a 3 oz or demitasse cup. Strong in taste with a rich bronze froth known as a crema on top.
Doppio : Simply a double espresso.
Ristretto: More concentrated than a regular espresso that is made with less water.
Lungo or Caffe Americano: An Espresso made with more water - opposite a Ristretto.
Macchiato: Espresso that is "marked" with a dollop of steamed milk on top.
Corretto: Espresso that is "corrected" with grappa, cognac or sambuca.
Cappuccino: Espresso with foamed milk and containing equal parts espresso, steamed milk and foamed milk.Usually drunk in the morning (never after a meal)
Cappuccino scuro: Cappuccino prepared with less milk and is a darker color.
Cappuccino chiaro: Cappuccino prepared with more milk (but less than a caffe latte) and is lighter in color.
Caffe' latte: Espresso made with more milk than a cappuccino but only a small amount of foam. In Italy it is usually a breakfast drink.
Latte macchiato: Steamed milk that is "marked" (sometimes ornately) with a shot of espresso coffee.

Sunday, October 18, 2009

Liver and Onions

Many people shudder at the thought of liver - well if they have eaten over-cooked pig’s liver, that is grey, tough and strong tasting, that would probably explain it!


Calves’ liver, lightly cooked so it is still pink inside is the type of liver that you should try. I use chicken and duck liver for pate' but for a hearty dish of liver and onions you MUST use calves ' liver. You can omit the bacon, but for me, this gives it an extra something!

This was a dish I would often make on weekends, accompanied by garlic mash potatoes and as a result, my kids grew up enjoying all kids of foods - I may even add my brain fritter recipe some day…but I digress. The point I want to make is that if children are used to eating most foods, they will! At home, I cooked fresh vegetables, fish, meats, pasta,and if we ever went to a fast food restaurant that was considered an anomaly and an outing in itself! Luckily, my friends all shared my belief that growing kids need home made food and as a result, even when we would go to friends' homes, we would always get a home cooked meal. We would meet up on weekends and have BBQ's, try different foods, fondue night etc etc. In my case what was on the table was the only food you would get - till the next meal!
Thanks to Sonia for this great recipe!

Ingredients
extra-virgin olive oil
unsalted butter
2 rashers bacon, chopped
2 red onions
a leaf of sage
9oz/250g calves liver, thinly sliced
6-8tbsp red wine
1 tsp balsamic vinegar

Method
Heat 1tbsp olive oil with 1tbsp butter in a frying pan. slice the onions as finely as possible and add to the pan with a good pinch of salt, the bacon and the sage leaf. Cook on a medium low heat, stirring occasionally.
In another large frying pan, heat 1tbsp oil. Add the liver to the pan, sprinkle with salt and cook for 30 to 45 seconds on each side. Remove from the pan and keep warm.
Add the wine to the pan and scrape the bottom of the pan with a wooden spoon to dislodge any browned bits. Add a tablespoon of butter and the vinegar.

Serve the liver with the onions, and the wine sauce

Friday, October 16, 2009

Torta Caprese

Torta Caprese, a classic of Italian Pasticceria, born in Capri, one of the most famous Mediterranean Islands. The reason for the fame of Torta Caprese is, firstly, to be found in its sublime flavour and then in the relative easiness of its preparation. But its success has also been prompted by other factors; the enthusiasm from returning-home international tourists who tried Torta Caprese while visiting Capri, the attention of the media to whatever is done on the island and, last but not least, the number of restaurants opened around the world by Capri’s people who migrated during the past century.

The origins of Torta caprese, although recent, are not clear. There are different versions; none of them can be confirmed beyond reasonable doubts. However, they all have at least two points in common; firstly: it wasn’t born in any island home, so it has to be an invention of the local hospitality industry; secondly: regardless the fact that good cuisine is intrinsic to the life of any Caprese, this dessert was created for the island’s tourist market.
 
This recipe is from a great site i found: ITchefs and co. Check out the site for great pics, a video and info!
 
Torta Caprese – The step by step recipe


Ingredients
250 gr butter at room temperature
250 gr chocolate, 66% cacao
250 gr sugar
250 gr almonds, not too finely grinded
120 gr egg yolks
220 gr egg whites
Salt
Icing sugar for dusting
Optional
1 shot glass of rum
1 vanilla pod
orange peel, grated

Method
Melt the chocolate and mix with the butter.
Whip the egg yolks and the sugar, then add to the first mixture.
Add the almonds, the vanilla, the orange peel, the rum and, finally, the egg whites, whipped to foaminess with the salt.
Place into mould, buttered and floured
And bake at 180° C for approximately 35 minutes. Dust with icing sugar.

Thursday, October 15, 2009

Foodie Exchange


I haven't had much time for new recipes today as I was too busy searching out genuine Arizona foodstuff for the Foodie Exchange.
I am exchanging with Oklahoma and Montreal and can't wait to see what arrives.

If you haven't heard about foodie exchange, this is it in a nutshell:
A group for foodies from all over the world who wish to be matched up with other foodies to exchange local food related items in the form of a 'care package'. Items should be limited to about $10.00 (not including shipping) in cost and be safe to mail!

So if you'd be interested in trying new food, herbs, spices, or just connecting with a fellow foodie...join up!


Google Groups
Foodie Exchange
Visit this group

Wednesday, October 14, 2009

Prawn Rarebit

Welsh rarebit is one of those dishes that I never get fed up of. It's an old-fashioned recipe that hardly anyone seems to know how to pronounce : it is pronounced “rabbit” !! The name probably originated in the 18th century as an insult to the Welsh. While rabbit was a poor man's meat in England, in Wales the poor man's “meat” was cheese.
Rarebit, is a savoury sauce made from melted cheese and various other ingredients and served hot over toasted bread.


This is a variation by Gary Rhodes.


Ingredients

4-6 x thick slices of French bread
melted butter, for brushing
1 tsp English mustard
a dash or two of Worcestershire sauce
150ml/5fl oz double or whipping cream
75g/3oz grated cheddar cheese
75g/3oz grated Gruyére cheese
175g/6oz cooked and peeled prawns

Method
1. Pre-heat the grill. Brush both sides of each bread slice with butter and toast the top and bottom to a golden brown under the grill
2. In a large bowl stir the mustard and Worcestershire into the cream. Extra mustard can be added for a stronger flavour.
3. Gently fold in the two cheeses and the prawns, then spoon the mixture onto the toasts.
4. Place under the grill (not too close to the heating element) and toast to a golden brown.
5. Serve.

Wednesday, October 7, 2009

Pumpkin and Pecan Tarts


I admit, I have become addicted to the Times on Line recipes. I must go though their pages at least 3 times a week!!!
Although I get quite a few recipes sent to me, i try to choose the most original and the Times on Line has an amazing selection of great recipes.

These Pumkin and Pecan Tarts are a cross between an American pumpkin pie and those fabulous Portuguese custard tarts, pasteis de nata.  They are super delicious and with haloween coming up, I am sure one can find a pumpkin or two to use!

Ingredients
500g all-butter puff pastry (recipe here)

100g butter
800g pumpkin or squash, cut into ½cm cubes
100g pecan halves, broken into bits, plus 12 extra halves

250g sugar
1 egg
100ml double cream
2 tsp plain flour
1 heaped tsp ground cinnamon
½ tsp ground ginger
½ tsp ground clove
About 1/4 of a nutmeg, grated
Zest of 1 orange
Icing sugar

Method
On a floured surface, roll out the pastry until it’s about 2mm thick. Cut 12 circles large enough to line the holes of a 12-hole nonstick muffin tin, leaving about 1cm standing out of the rim; my muffin tray has holes of about 7cm wide and 2cm deep, so the circles of dough are about 12cm across (you may not need all the pastry). Put in the fridge while you deal with the pumpkin.

Heat the oven to 200C/400F/Gas Mark 6. In a large frying pan, melt the butter, then add the pumpkin cubes and cook over a medium heat for about 10 minutes, stirring often, until the pumpkin is soft. Add the 100g of pecans and cook for 1 minute, then stir in the sugar and cook for a minute more, until the whole thing is brown and bubbling. Leave to cool for 10 minutes.

Beat together the egg, cream, flour, spices and orange zest until thoroughly mixed. Stir together with the pumpkin and pecan mixture, then carefully spoon into the chilled shells so they are about three-quarters full — you may not need all of the mixture. Put a pecan half on top of each and bake in the oven for 25 minutes. The tops will bubble and rise, but will sink back as they cool.

Allow to cool until just warm or room temperature, sprinkling the tops lightly with icing sugar before you eat — with whipped cream, ideally.
Related Posts Plugin for WordPress, Blogger...


Visit We Are Chefs


All the recipes here have either been sent to me, adapted by me or found on the web. If I know the source I always give credit to the author/website. If you know of a source I may have missed please let me know.